Welcome to my blog! I hope you find some inspiration for your projects, the same way that I find inspiration from the many blogs that I visit each day. My goal for this space is to show and explain the many crafts, food, home decor and genealogy projects that I have done and continue to do. Whenever possible, I'll try to include a list of materials. No promises though, since some of my materials are from many years ago and I don't remember where they came from.
Friday, January 21, 2011
Halloween Layout using A Child's Year
All the cutouts for this layout are from the Cricut cartridge "A Child's Year". I just love the silhouette look of the images from this cartridge. I wish I could tell you who makes the paper but I bought it at a garage sale and it didn't have any information printed on it.
Just a reminder: You can click on most of the images in this blog to see them closer.
Materials: Cricut "A Child's Year" cartridge, Signo White Gel Pen, Stampin' Up Photo Corners Extra-Large Punch
Labels:
Cricut,
Cricut - A Child's Year,
Halloween,
scrapbooking
Thursday, January 20, 2011
BOO! Halloween Layout
My daughter and nephew on Halloween in 2007. Aren't they scary?
Materials: Creative Imaginations Halloween Collection "Pumpkin Patch" paper, My Mind's Eye Blackbird Collection Halloween "Neighborhood" paper, My Mind's Eye The Spider's Web "Cauldron Bubbles" paper, Creative Imaginations JUST BATTY Halloween Bats Polka Dots 12x12 paper, Imaginisce Bazzill Collection Bling Blossoms Large Black Tie Flowers, Colorbok Stkr Lyrd Gltr Title Boo, Stampin' Up Scallop Edge Border, Cricut "Winter Woodland" cartridge, Stampin' Up Corner Punch Extra-Large punch
Wednesday, January 19, 2011
Valentine's Day Card
I made this card for my husband last year for Valentine's Day. I tried not to make it too "girly", hence the grey and black. The "love" words are a stamp. To make the heart, I first embossed and stamped the "love" stamp multiple times on the pink paper and then cut out a heart using my Cricut. Then, I cut a slightly larger heart in white. I put a foam dot between the two hearts to make it "pop" out.
Materials: Stampin' Up Basic Grey card stock, Cricut George and Basic Shapes cartridge, Stampin' Up Noteworthy stamp set, Stampin' Up white stampin' emboss powder, Stampin' Up Whisper White Craft Stamp Pad, Marvy Embossing Heat Tool, Stampin' Up Stampin' Dimensionals, Making Memories Plaque - XOXOXO
Monday, January 17, 2011
Stampin' Up Valentine Treats
I made 20 of these for my daughter to give away to her classmates at school. These were made with two different Stampin' Up stamp sets. I own one set and my sister-in-law owns the other. We got together so we could each make 10 of each kind. We added the scallop piece of card stock on the back for added support so they would make it home intact.
Materials: Stampin' Up Chocolate Chip card stock, Cricut "Plantin Schoolbook" cartridge, Stampin Up "Sweet Centers" stamp set, Stampin Up "Sweetheart" stamp set, Stampin Up Full Heart Punch, EK Paper Shapers Whale Of A Punch Circle 2" (actually punches a circle about 1 5/8"), Stampin' Up Sweet Treat Cup, Stampin' Up Heart Treat Cup
Sunday, January 16, 2011
Valentine's Day Altered Frappuccino Bottle and Card
This was a Valentine's present that I made for my daughter's teacher. The bottle is a Starbucks Frappuccino bottle. I had fun decorating and drinking the contents! I'll fill the Starbucks container with chocolates. The heart and swirl stamps are all Autumn Leaves, although I can't remember from what collection.
Materials: Stampin' Up Chocolate Chip card stock, Stampin' Up Pretty in Pink card stock, Stampin' Up Full Heart Extra-Large Punch, Stampin' Up Scallop Trim Border Punch
Thursday, December 2, 2010
JOY Christmas Banner

There is still time to make a banner for Christmas. This one is pretty fast since there was only 3 letters!
Materials: DCWV 12x12 Holiday Collection Christmas Stack - 2009, Cricut "Plantin Schoolbook" Cartridge, Cricut "Accent Essentials" Cartridge,
Wednesday, December 1, 2010
Woodland Forest Service Birthday Party
I haven't posted in FOREVER but the good news is that I had a very good excuse and lots of new things to share.
The following are photos from my sons 2nd birthday party. My husband works for the U.S. Forest Service so I thought it would be fun to have a Woodland/Forest Service Party.

The invitation was a 3 dimensional card. It folded for mailing and then "popped" open so you could stand it up. The party information was printed on the back.

Door Sign

Outside Party Area

Beverage Table

Close-up of the felt banner that I made. I thought the outside area needed a little color so I cut felt pieces into triangles and sewed them together connecting them with a wide ribbon.

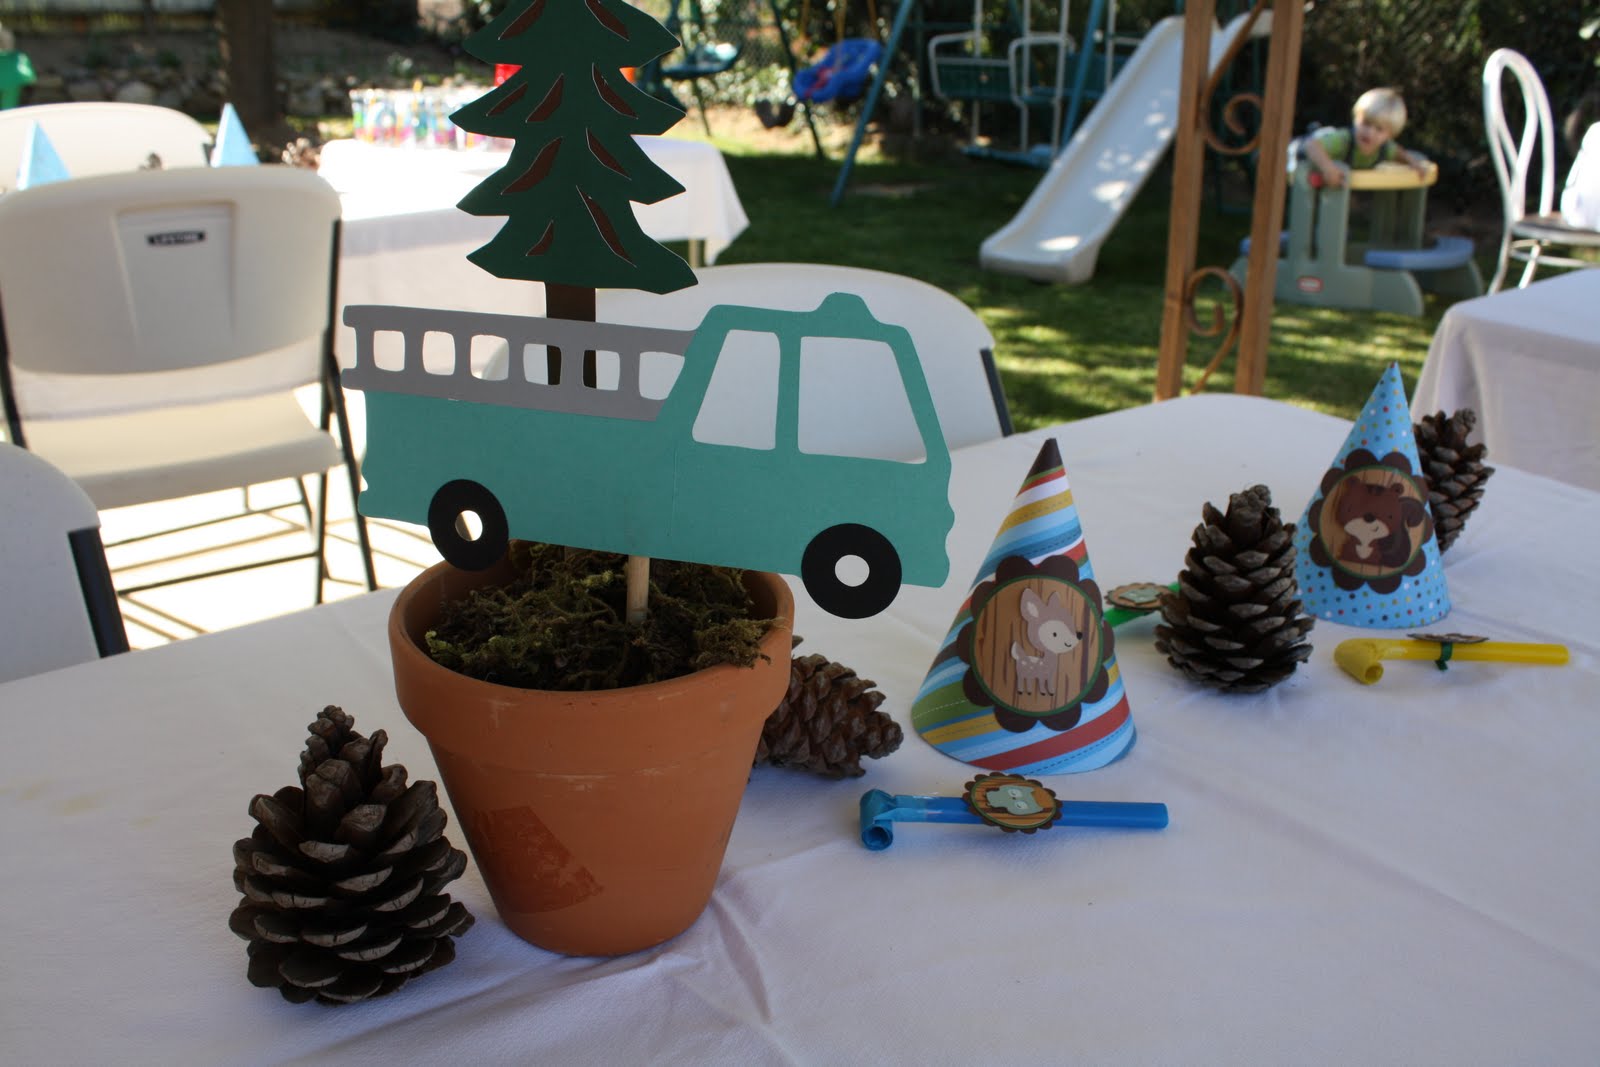
It took a while but I found paper that was VERY close to the color of U.S. Forest Service trucks.

This is the second time I've made hats for a birthday party. I bought two sets of party hats at our local 99 cents store and covered them with my own paper. I disassembled one to use as a pattern. You can make your own completely from scratch but these already have the stretchy string.


Every good party needs something to do. To tie in to the theme, I decided to have the kids paint their own wooden bird houses. As you can see the kids (and even some of the adults) were very involved.


Finished Bird Houses


Sweets Table.

Milk and Dark Chocolate Owl Suckers

Edible Chocolate Bird Nests

Edible acorns. Mini Nilla wafers with Hershey kisses and Reese's Peanut Butter Chips. I used a lighter to quickly melt the chocolate a bit to make it stick to the wafers.

Party Favor Bags.

Materials: Cricut "Camp Out" Cartridge, Cricut "Create A Critter" Cartridge, Cricut "Everyday Paper Dolls" Cartridge, Cuttlebug Embosser and Die Cutter
The following are photos from my sons 2nd birthday party. My husband works for the U.S. Forest Service so I thought it would be fun to have a Woodland/Forest Service Party.
The invitation was a 3 dimensional card. It folded for mailing and then "popped" open so you could stand it up. The party information was printed on the back.
Door Sign
Outside Party Area
Beverage Table
Close-up of the felt banner that I made. I thought the outside area needed a little color so I cut felt pieces into triangles and sewed them together connecting them with a wide ribbon.
It took a while but I found paper that was VERY close to the color of U.S. Forest Service trucks.
This is the second time I've made hats for a birthday party. I bought two sets of party hats at our local 99 cents store and covered them with my own paper. I disassembled one to use as a pattern. You can make your own completely from scratch but these already have the stretchy string.
Every good party needs something to do. To tie in to the theme, I decided to have the kids paint their own wooden bird houses. As you can see the kids (and even some of the adults) were very involved.
Finished Bird Houses
Sweets Table.
Milk and Dark Chocolate Owl Suckers
Edible Chocolate Bird Nests
Edible acorns. Mini Nilla wafers with Hershey kisses and Reese's Peanut Butter Chips. I used a lighter to quickly melt the chocolate a bit to make it stick to the wafers.
Party Favor Bags.
Materials: Cricut "Camp Out" Cartridge, Cricut "Create A Critter" Cartridge, Cricut "Everyday Paper Dolls" Cartridge, Cuttlebug Embosser and Die Cutter
Subscribe to:
Posts (Atom)